AUTOMATING VENDOR INVOICE POSTING WITH WORKFLOW APPROVAL IN D365 FINANCE
CONTENT Introduction Configuration End-to-End demo Conclusion |
INTRODUCTION
Managing vendor invoices efficiently is a crucial aspect of the Procure-to-Pay process in Dynamics 365 Finance and Operations (D365FO). Manual posting of vendor invoices after approval can often lead to delays, increased workload, and potential errors. However, with the Automatic Posting Upon Approval feature in D365FO's workflow setup, you can streamline this process, reducing manual intervention and speeding up the overall cycle time.
In this article, we will explore workflow automation capabilities in D365FO and focus on automating vendor invoice posting once the invoice is approved. This feature not only enhances efficiency but also ensures consistency and compliance, as the entire process is executed seamlessly within the system.
CONFIGURATION
In this article, we will explore two optional workflow configurations designed to enhance your invoice registration process.
First, automated invoice posting. This setup allows you to configure the workflow to automatically post invoices once they are approved, eliminating the need for manual posting. The key benefits of this approach include faster processing times, reduced manual effort, and minimized risk of errors, ultimately contributing to a more streamlined Procure-to-Pay process.
Second, placeholders. Placeholders carry field values on D365FO approval screens or in emails. By using placeholders, you can provide better insights to the approver, helping them understand why the item is awaiting approval. Placeholders are temporary objects or items used to represent specific data or actions in a workflow configuration, ensuring that workflow actions or notifications include specific references to the item being processed.
Let's delve into the workflow configuration details. This article demonstrates above workflow configurations on vendor invoices based on purchase orders.
First, let's create a workflow for vendor invoices.
Accounts payable >> Setup >> Accounts payable workflows.
There is no Vendor invoice workflow configured in my system.
Click on +New and select Vendor invoice workflow.
Workflow continues with approval steps. Approval steps may contain single or multiple approvers. In our case, there is just one approver and there is only one approval step. Inside of main approval branch is as below.
Finally, we have Automated posting. This is last workflow step that posts approved purchase order invoices automatically. Note: This is not a batch job, this is part of the workflow approval process.
Let's configure placeholders now as well.
First, setting up a message with placeholder for submission instructions. Select the main workflow frame and click on Basic settings.
Type your message by including placeholders.
Below example uses invoice number as a placeholder:
"Invoice %Vendor invoices.Num% is ready for submission."
Select the individual approval step and click on Basic settings.
Type your message by including placeholders.
Below example uses invoice number as a placeholder:
"Invoice number %Vendor invoices.Num% is waiting for your approval."
Additionally,
Click on Insert placeholders under Work item instructions section.
Type your message by including placeholders.
Below example uses invoice number as a placeholder:
Please review and approve vendor invoice %Vendor invoices.Num%."
Save and close the workflow configuration, don't forget to activate the workflow. Active and ready invoice workflow approval should be looking like below.
Let's do the end-to-end demo in order to demonstrate the function of Placeholders and Automated invoice posting.
END-TO-END DEMO
Create a PO, receive it and get ready for invoice registration.
Find your purchase order on the purchase orders list page under
Accounts payable >> Purchase orders >> All purchase orders
or
Procurement and sourcing >> Purchase orders >> All purchase orders
Click on Invoice button.
Enter the invoice information and click on Workflow at the top.
Note that now system shows you the submission instruction that includes the placeholder(s).
Submit the workflow.
(The expectation is to see similar placeholder usage for approval instructions at the moment of approval.)
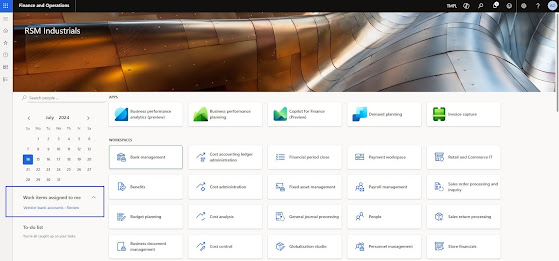
Go to Work items assigned to me on the D365FO's dashboard page. Click on the item that is pending. System should take you to pending invoice screen.
Click on Workflow at the top.
Note that now system shows you the approval instruction that includes the placeholder(s).
Click on Approve.
Wait for the completion of workflow approval process. You can see that from the workflow history on the pending invoice.
Let's now go to workflow history details.
Organization administration >> Workflow >> Workflow history
Find the related workflow and click on the instance id.
Automated workflow posting step now can be seen as shown below.
The voucher of this transaction is as below.
CONCLUSION
In conclusion, automating vendor invoice posting through workflow approval in Dynamics 365 Finance significantly streamlines the Procure-to-Pay process. By implementing the automatic posting feature, you can reduce manual intervention, increase processing speed, and minimize errors. Additionally, the use of placeholders enhances the user experience by providing clear and relevant information during the approval process. Overall, these configurations offer a more efficient and consistent approach to managing vendor invoices, ensuring compliance and improving operational efficiency.


