CONFIGURABLE BUSINESS DOCUMENTS IN DYNAMICS 365 FINANCE AND OPERATIONS - PART 3 - MAKING A DIRECT FORMAT CHANGE
This article series explains and demonstrates configurable business document use in real life scenarios. The purpose is to provide a unique implementation resource. Whole series will be in 5 parts as follows:
PART 3: Making a direct format change
Let's get started with PART 3.
Introduction
In this part of the series, we will concentrate on making a direct format change on Microsoft's out-of-box sales order packing slip that is a Configurable Business Document (CBD).
Lifecycle of a configurable business document is as below. Last 3 tiles will be covered in this post.
Derive a new document format: We will generate a new editable sales order packing slip design from the out-of-box Microsoft design since Microsoft doesn't allow us to make a change on the original design.
Deriving a new document format can be done in 2 ways:
- Manually deriving a new format via Organization administration >> Electronic reporting >> Configurations
- Automatically deriving a new format via new streamlined Business Document Management workspace
We will use Business Document Management workspace since it's easier.
Go to Electronic reporting workspace and click on Reporting configurations.
Note that there are some prerequisites of making changes on the out-of-box documents.
- Configuration provider creation
- Set new configuration provider as active
In our case, I created "Your company" as a new provider and set it as active.
A design change is done on the format component of configurable business documents. Format contains attachment.
You can see how the document look like by clicking on Attachments button.
Deriving a new document format and making static format changes will be done in the Business Document Management workspace.
(We will not make a data-related change. That's why there is no need to derive a new data model or model mapping from the original Microsoft components.)
Let's make our changes.
Go to Organization administration >> Business document management workspace.
Click on New document.
Select the document template and click on Create document button.
Enter template title and template name. Note that comment is generated automatically by the system.
Click on OK.
System automatically generates a new template to be edited.
Make your changes on the template.
Go back to previous screen when you complete your changes.
Click on Publish to activate your changes.
Click on Yes.
Document status becomes "Published".
Go to configurations screen after publishing the document. Note that system automatically created a new format in the configurations screen. New format name is Sales order packing slip (excel) Your company.
There are 2 versions:
- 27.27.1: Derived, completed, original,
- 27.27.2: Derived, draft, generated automatically for future use.
Alternatively, we are also able to manually derive a new format from the original one in this screen and make the necessary changes accordingly.
Now, design is ready, let's activate it.
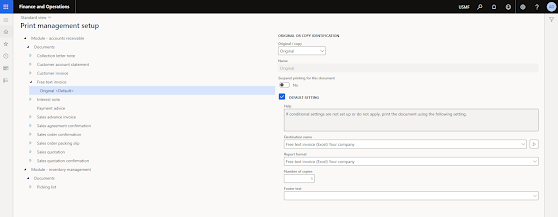
Go to related print management screen, in our case, Accounts receivable >> Setup >> Form setup
Click on Print management
Go to Sales order packing slip where the report design is selected.
Change report format from old design to new design.
Do not forget to complete required configuration of the destination name.
Now, let's see the impact of changes.
OLD design
NEW design
BONUS: DERIVE A NEW FORMAT MANUALLY
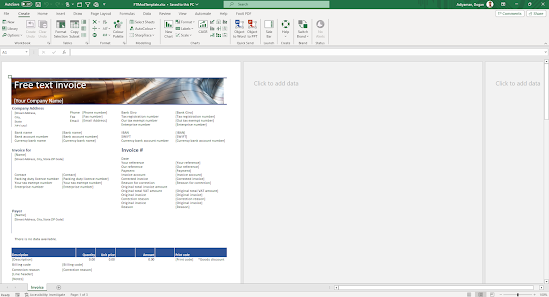
Let's derive a new format manually. We will use out-of-box Free text invoice design as base and make a change on it.
Go to the format that you want to change.
Name will be "Free text invoice (Excel) (Your company)".
You don't need to enter Data model version field.
Note
- If you select a specific version of the base data model, the structure of the corresponding version of the data model will be presented to you as the structure of the Model data source in the format that is created.
- You can leave this field blank. In that case, the structure of the Draft version of the data model will be presented to you as the structure of the Model data source in the format that is created. You can then adjust your model and immediately see those adjustments in your format. This approach might improve the efficiency of ER solution design when you configure your data model, model mapping, and format simultaneously.
- If you select a specific version of the base data model, you can switch to using the Draft version later, when you start to edit a format.
Select Create configuration to create the configuration. We now have an editable template.
Let's download the template to be edited.
Click on Designer.
Open the attachment.
Make the format changes. Save the file.
Close the file.
Go back to the previous page.
Go to Import action pane and click on Update from Excel. (1)
Select the modified template. (3)
Click on OK. (4)
Save the new template. (5)
Switch to View action pane. (6)
Click on Attachments. (7)
System shows preview of the uploaded new file.
Go back to Configurations form.
Change "Run Draft" parameter to "Yes".
(First time realizing that the second word's first letter is capitalized).
Change status to "Complete".
Final form view should be as follows.
As result, new document is now available in Published status on Business document management workspace as follows:
New template is ready to be used.
DESIGN COMPARISONS
As of now, there are 3 different Free Text Invoice designs in the system.
- SSRS (Out-of-box)
- Configurable business document (CBD) (Out-of-box)
- Configurable business document (CBD) (Customized)
These setups can be seen in the AR module's Print management form as below:
Let's compare these designs.
SSRS (Out-of-box)
Configurable business document (CBD) (Out-of-box)
Configurable business document (CBD) (Customized)
KEY TAKEAWAYS:
- Easiest way to make static changes on the report format is Business document management workspace. This is a new form that streamlines the document change process.
- An alternative way is deriving ER components manually in the Configurations form.
- Design data changes will be discussed in the next article.
Next, adding fields to a (configurable) business document.
Stay tuned!


No comments:
Post a Comment